今回は、GrafanaをCentOS9にインストールしてみた内容を紹介します。
インストール方法はRPMリポジトリからインストールします。
環境
利用する環境は以下の通りです。
| OS | CentOS Stream release 9 |
| Grafana | grafana-11.3.0-1 |
インストール手順
Step1. GPG キーのインポート
GPGキー(GNU Privacy Guard)とは、というオープンソースのツールの公開鍵です。
Grafana用のGPGキーをインポートします。
実行するコマンドは以下の通りです。
wget -q -O gpg.key https://rpm.grafana.com/gpg.key
sudo rpm --import gpg.key
実行結果は以下の通りです。
[root@localhost ~]# wget -q -O gpg.key https://rpm.grafana.com/gpg.key
[root@localhost ~]# rpm --import gpg.key
[root@localhost ~]#
Step2. Grafana用リポジトリ作成
Grafanaのインストールに必要なリポジトリを作成します。
実行コマンドは以下の通りです。
vi /etc/yum.repos.d/grafana.repo

以下の内容を記載する。
[grafana]
name=grafana
baseurl=https://rpm.grafana.com
repo_gpgcheck=1
enabled=1
gpgcheck=1
gpgkey=https://rpm.grafana.com/gpg.key
sslverify=1
sslcacert=/etc/pki/tls/certs/ca-bundle.crt
実行結果は以下の通りです。
[root@localhost ~]# vi /etc/yum.repos.d/grafana.repo
[root@localhost ~]# cat /etc/yum.repos.d/grafana.repo
[grafana]
name=grafana
baseurl=https://rpm.grafana.com
repo_gpgcheck=1
enabled=1
gpgcheck=1
gpgkey=https://rpm.grafana.com/gpg.key
sslverify=1
sslcacert=/etc/pki/tls/certs/ca-bundle.crt
[root@localhost ~]#
Step3. Grafanaインストール
Grafanaをインストールします。
実行コマンドは以下の通りです。
dnf install grafana実行結果は以下の通りです。
[root@localhost ~]# dnf install grafana
CentOS Stream 9 - BaseOS                                                                                                     8.3 kB/s | 7.6 kB     00:00
CentOS Stream 9 - AppStream                                                                                                   29 kB/s | 7.7 kB     00:00
CentOS Stream 9 - Extras packages                                                                                             25 kB/s | 8.6 kB     00:00
grafana                                                                                                                      3.4 kB/s | 712  B     00:00
grafana                                                                                                                       53 kB/s | 2.4 kB     00:00
GPG 鍵 0x10458545 をインポート中:
 Userid     : "Grafana Labs <engineering@grafana.com>"
 Fingerprint: B53A E77B ADB6 30A6 8304 6005 963F A277 1045 8545
 From       : https://rpm.grafana.com/gpg.key
これでよろしいですか? [y/N]: y
grafana                                                                                                                       54 MB/s | 134 MB     00:02
rundeck                                                                                                                      329  B/s | 833  B     00:02
依存関係が解決しました。
=============================================================================================================================================================
 パッケージ                           アーキテクチャー                     バージョン                             リポジトリー                         サイズ
=============================================================================================================================================================
インストール:
 grafana                              aarch64                              11.3.0-1                               grafana                              116 M

トランザクションの概要
=============================================================================================================================================================
インストール  1 パッケージ

ダウンロードサイズの合計: 116 M
インストール後のサイズ: 447 M
これでよろしいですか? [y/N]: y
パッケージのダウンロード:
grafana-11.3.0-1.aarch64.rpm                                                                                                  14 MB/s | 116 MB     00:08
-------------------------------------------------------------------------------------------------------------------------------------------------------------
合計                                                                                                                          14 MB/s | 116 MB     00:08
トランザクションを確認しています
トランザクションの確認に成功しました。
トランザクションをテストしています
トランザクションのテストに成功しました。
トランザクションを実行しています
  準備中           :                                                                                                                                     1/1
  インストール中   : grafana-11.3.0-1.aarch64                                                                                                            1/1
  scriptletの実行中: grafana-11.3.0-1.aarch64                                                                                                            1/1
### NOT starting on installation, please execute the following statements to configure grafana to start automatically using systemd
 sudo /bin/systemctl daemon-reload
 sudo /bin/systemctl enable grafana-server.service
### You can start grafana-server by executing
 sudo /bin/systemctl start grafana-server.service

POSTTRANS: Running script

  検証中           : grafana-11.3.0-1.aarch64                                                                                                            1/1

インストール済み:
  grafana-11.3.0-1.aarch64

完了しました!
[root@localhost ~]#
Step.4 Firewalld設定(Grafanaのアクセス許可)※必要に応じて
Firewalldサービスを有効化して、通信制限している場合は、Grafanaのデフォルトポート(3000)の通信許可を追加します。
実行コマンドは以下の通りです。
firewall-cmd --add-port=3000/tcp --permanent
firewall-cmd --reload
実行結果は以下の通りです。
[root@localhost ~]# firewall-cmd --add-port=3000/tcp --permanent
success
[root@localhost ~]#
[root@localhost ~]# firewall-cmd --reload
success
[root@localhost ~]# firewall-cmd --list-all
public (active)
  target: default
  icmp-block-inversion: no
  interfaces: enp0s1
  sources:
  services: cockpit dhcpv6-client ssh
  ports: 4440/tcp 9200/tcp 9300/tcp 3000/tcp
  protocols:
  forward: yes
  masquerade: no
  forward-ports:
  source-ports:
  icmp-blocks:
  rich rules:
[root@localhost ~]#
Step.5 Grafanaのサービス起動、自動起動設定
Grafanaサービスを起動し、システム起動時に自動的に開始されるように設定します。
実行コマンドは以下の通りです。
systemctl start grafana-server
systemctl enable grafana-server
実行結果は以下の通りです。
[root@localhost ~]# systemctl status grafana-server
○ grafana-server.service - Grafana instance
     Loaded: loaded (/usr/lib/systemd/system/grafana-server.service; disabled; preset: disabled)
     Active: inactive (dead)
       Docs: http://docs.grafana.org
[root@localhost ~]#
[root@localhost ~]# systemctl start grafana-server
[root@localhost ~]# systemctl enable grafana-server
Synchronizing state of grafana-server.service with SysV service script with /usr/lib/systemd/systemd-sysv-install.
Executing: /usr/lib/systemd/systemd-sysv-install enable grafana-server
Created symlink /etc/systemd/system/multi-user.target.wants/grafana-server.service → /usr/lib/systemd/system/grafana-server.service.
[root@localhost ~]# systemctl status grafana-server
● grafana-server.service - Grafana instance
     Loaded: loaded (/usr/lib/systemd/system/grafana-server.service; enabled; preset: disabled)
     Active: active (running) since Sun 2024-11-10 12:42:35 JST; 1min 34s ago
       Docs: http://docs.grafana.org
   Main PID: 134482 (grafana)
      Tasks: 16 (limit: 22571)
     Memory: 78.8M
        CPU: 2.171s
     CGroup: /system.slice/grafana-server.service
             └─134482 /usr/share/grafana/bin/grafana server --config=/etc/grafana/grafana.ini --pidfile=/var/run/grafana/grafana-server.pid --packaging=rpm cfg:default.paths.logs=/var/log/grafana cfg:def・・・

11月 10 12:42:36 test grafana[134482]: logger=grafana-apiserver t=2024-11-10T12:42:36.091050669+09:00 level=info msg="Adding GroupVersion iam.grafana.app v0alpha1 to ResourceManager"
11月 10 12:42:36 test grafana[134482]: logger=plugins.update.checker t=2024-11-10T12:42:36.158303355+09:00 level=info msg="Update check succeeded" duration=265.284342ms
11月 10 12:42:36 test grafana[134482]: logger=plugin.angulardetectorsprovider.dynamic t=2024-11-10T12:42:36.173520001+09:00 level=info msg="Patterns update finished" duration=210.103088ms
11月 10 12:42:36 test grafana[134482]: logger=sqlstore.transactions t=2024-11-10T12:42:36.174956917+09:00 level=info msg="Database locked, sleeping then retrying" error="database is locked" retry=0 code=・・・
11月 10 12:42:36 test grafana[134482]: logger=grafana.update.checker t=2024-11-10T12:42:36.178946115+09:00 level=info msg="Update check succeeded" duration=286.113483ms
11月 10 12:42:36 test grafana[134482]: logger=plugin.installer t=2024-11-10T12:42:36.631650017+09:00 level=info msg="Installing plugin" pluginId=grafana-lokiexplore-app version=
11月 10 12:42:36 test grafana[134482]: logger=installer.fs t=2024-11-10T12:42:36.729930178+09:00 level=info msg="Downloaded and extracted grafana-lokiexplore-app v1.0.2 zip successfully to /var/lib/grafa・・・
11月 10 12:42:36 test grafana[134482]: logger=plugins.registration t=2024-11-10T12:42:36.749358154+09:00 level=info msg="Plugin registered" pluginId=grafana-lokiexplore-app
11月 10 12:42:36 test grafana[134482]: logger=plugin.backgroundinstaller t=2024-11-10T12:42:36.749406363+09:00 level=info msg="Plugin successfully installed" pluginId=grafana-lokiexplore-app version= dur・・・
11月 10 12:43:11 test grafana[134482]: logger=infra.usagestats t=2024-11-10T12:43:11.907205638+09:00 level=info msg="Usage stats are ready to report"
[root@localhost ~]#
以上で、インストールは完了です。
動作確認
Grafanaの管理画面にアクセスできるか確認します。
URLは以下の通りです。
http://<サーバーのIPアドレス>:3000実行結果は以下の通りです。
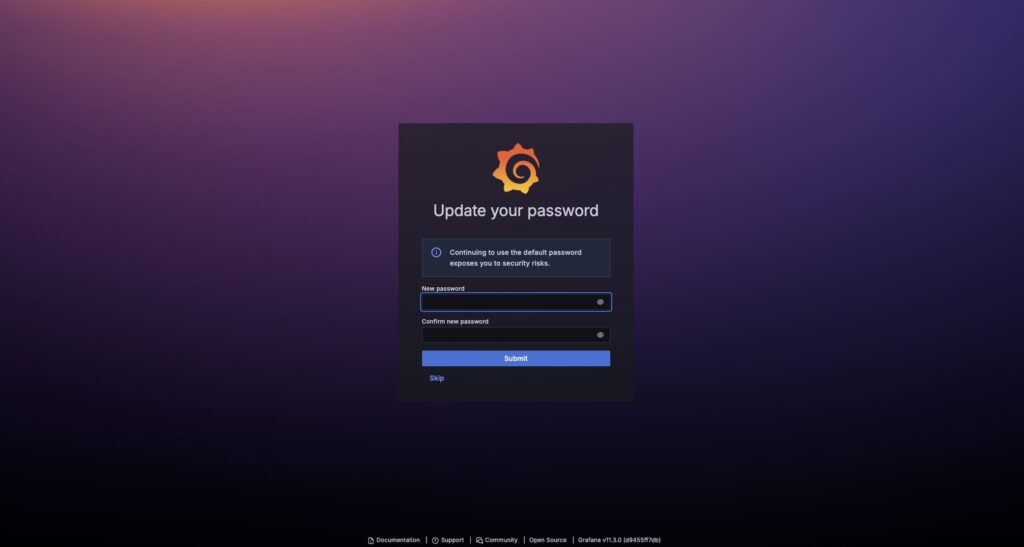
管理画面のログイン画面が表示されることが確認できます。

初期ユーザ・パスワードはadmin/adminなので、そちらでログインすると、初期パスワードの変更を求められるので、適切なパスワードに変更します。

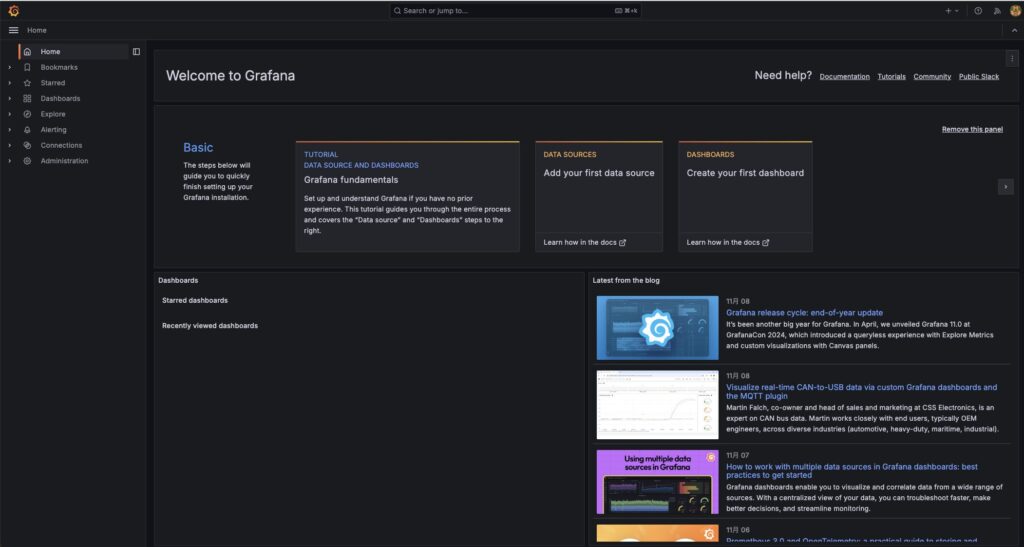
パスワード変更後、以下のTOP画面に遷移されます。

以上で、接続確認は完了です。
まとめ
今回は、CentOS9へGrafanaをインストールし、管理画面が表示されることを確認しました。
参考になれば、幸いです。
以上になります。ありがとうございました。
参考
https://grafana.com/docs/grafana/latest/setup-grafana/start-restart-grafana
https://qiita.com/miyuki_samitani/items/9c155111220cecac5154
https://qiita.com/frozencatpisces/items/f6e331c1c1c14be7275d
https://www.server-world.info/query?os=CentOS_Stream_9&p=grafana


コメント